Flashing Yocto Image to a USB
This page provides a step-by-step guide for flashing the new Yocto image to a USB drive.
Flashing the image to your drive will wipe all existing contents, so make sure you copy any and all important files on the drive to another location before flashing!
Install Raspberry Pi Imager
Section titled “Install Raspberry Pi Imager”-
Go to this page and download the imager for your OS.
- The flash process has been tested and verified to work on both Windows and Linux
- We have no reason to believe it would fail on a Mac, but it has not been tested
-
Go through the installer steps to install the imager app.
-
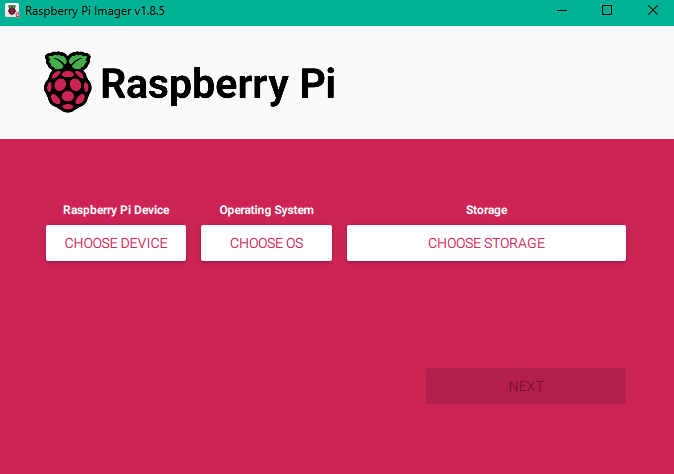
Once installation is complete, open the imager app. You should see this screen:
Download OS Image
Section titled “Download OS Image”- Download the latest Yocto image from this Google Drive location.
- Unzip the compressed image. You should now have a
bambauer-yocto-X.X.X.imgfile ready to flash, whereX.X.Xis the Yocto version number.
Flash OS to USB Drive
Section titled “Flash OS to USB Drive”Once you have the imager app installed, you’re ready to flash the new Yocto OS to your USB drive. Here are the steps:
-
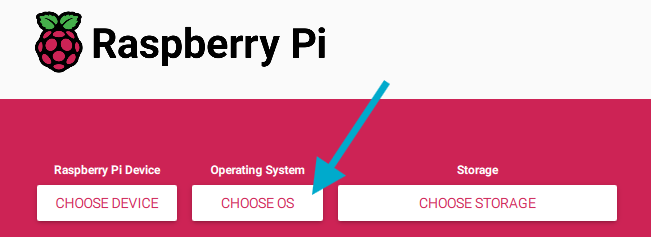
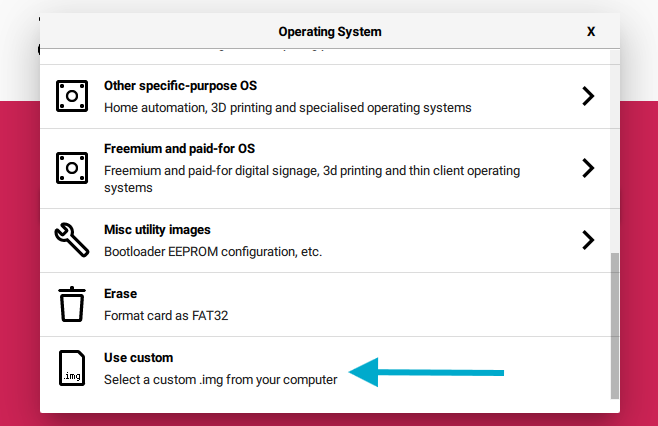
Click the Choose OS button, then scroll all the way down and select Use custom.
-
Select the Yocto image from wherever you stored it in your local filesystem.
-
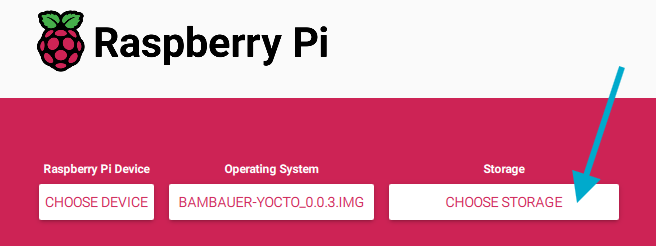
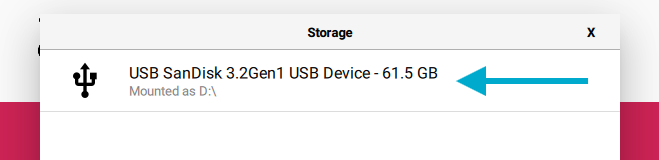
Next, click the Choose Storage button, then select your desired USB drive to be flashed.
-
Once you have selected the Yocto image and USB device, click the Next button.
-
A popup will appear asking about OS customization settings. Click No to skip and continue.
-
A final popup will appear to warn you that the current contents of the USB drive will be erased. Click Yes to acknowledge and begin the install.